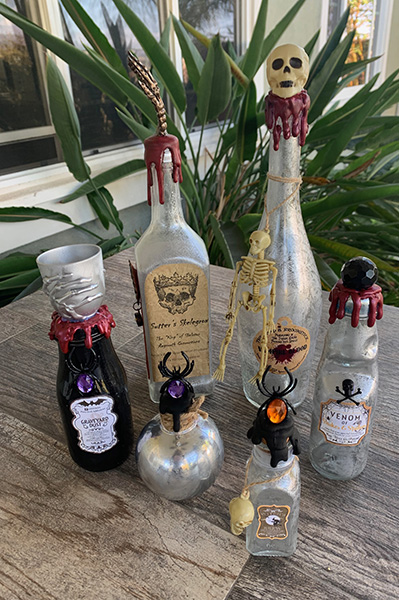
If you’re into decorating for Halloween, making magic potion bottles is a fun project to do with family and friends or for guests at a Halloween party. Craft Harry Potter-inspired bottles into spooky (or not-so-spooky) props to decorate the house or patio or to include in a “Boo Your Neighbors” activity. Be sure to print out our free, printable potion bottle labels below. Local artist, Emily Dolton, first made potion bottles when we hosted a Harry Potter movie night for the Special Needs Resource Foundation of San Diego. It became a favorite project for some of our families.
This DIY Halloween project repurposes old bottles, embellishments and costume jewelry that might be headed for the trash or recycling bin. Read below for tips and instructions.
MATERIALS
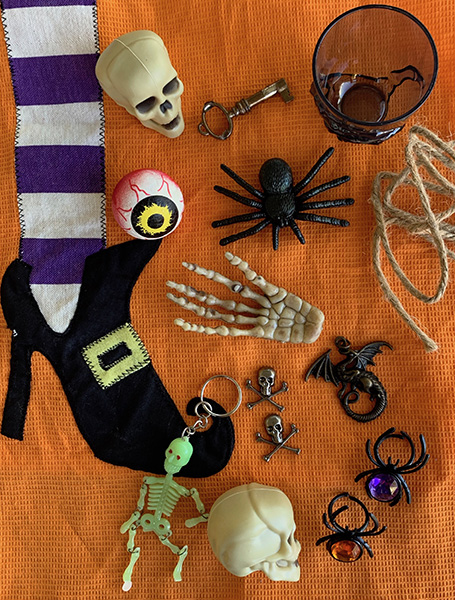
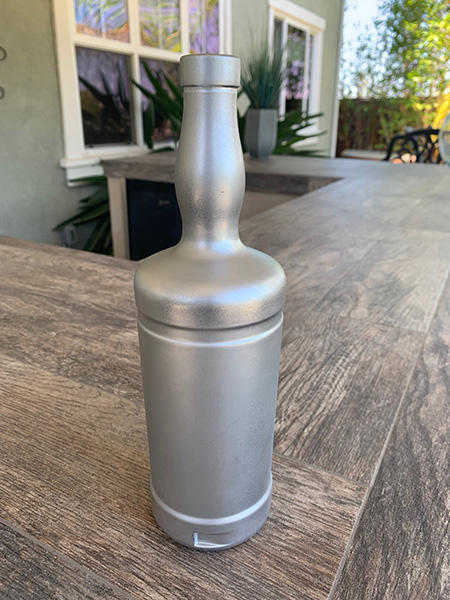
- Empty spice, wine, oil or liquor bottles (anything with a unique shape), carefully and thoroughly washed
- Silver, black, red spray paint
- Printed potion labels (see free pdf below)
- Hot glue gun and glue
- Embellishments such as old beads, costume jewelry, dice, twine
- Small skeletons, skulls, eyeballs (check your local dollar store)
- Black or red acrylic paint
- Paintbrush
*Note: Parent supervision needed when using hot glue guns.
DIRECTIONS
- Be sure to carefully and thoroughly wash and dry the empty bottles you’ve chosen for the project.
- Spray paint each bottle in desired spooky color(s); allow to dry.
- Meanwhile, print the free, printable potion labels below.
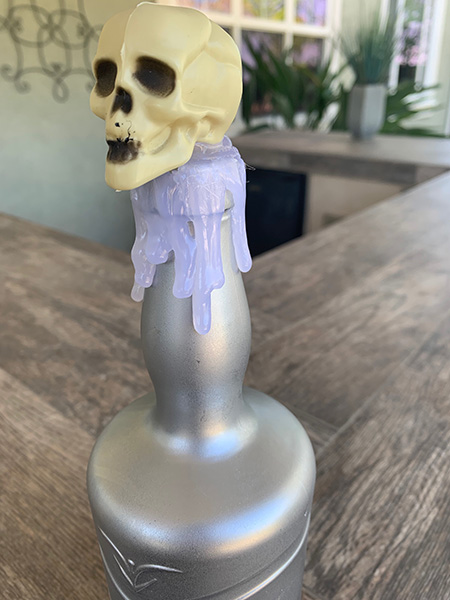
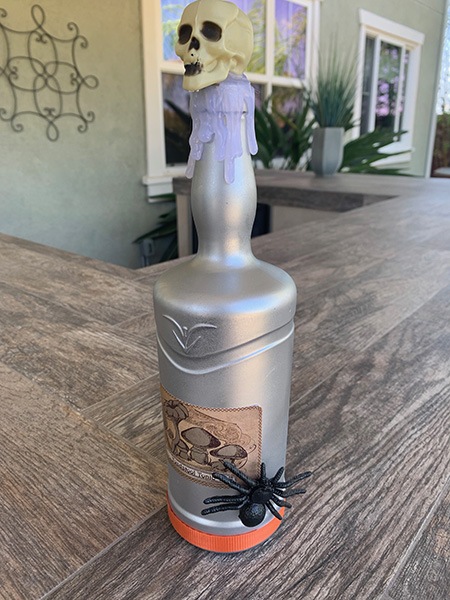
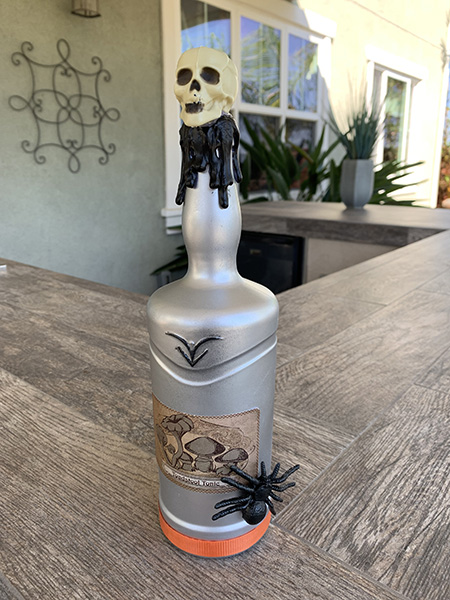
- Use hot glue to attach labels and other embellishments onto dry bottles. Be creative!
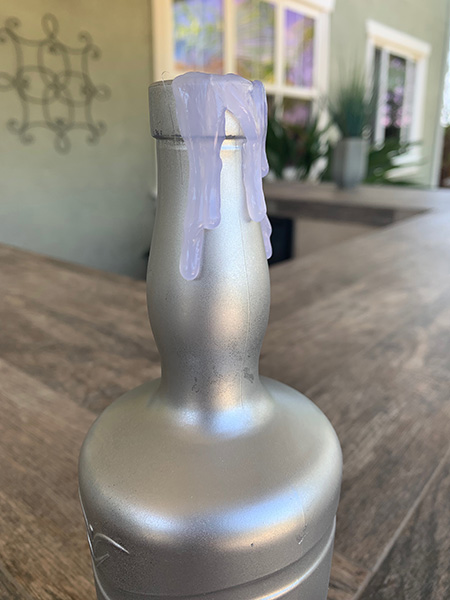
- Add a bunch of hot glue around the top of the bottles, and sort of push more down the side of the rim (with the glue gun) so looks like dripping wax. Be sure to stagger the lengths of the hot glue drips. Allow to dry.
- Using acrylic paint and a brush, paint the (dried) excess glue at the top in black, red or your choice or color.
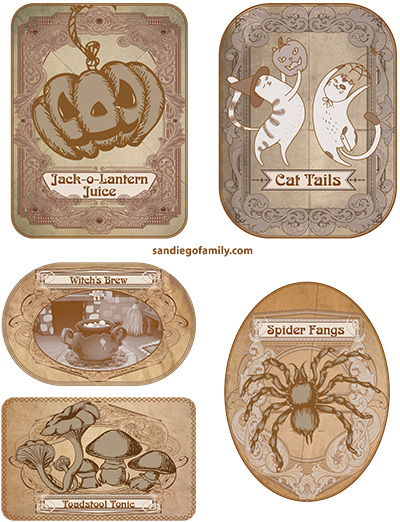 Click image to download pdf and print these awesome labels for free.
Created by the San Diego Family Magazine staff. Photos provided by Michele Hancock.
____________


