Campfire crown 2336

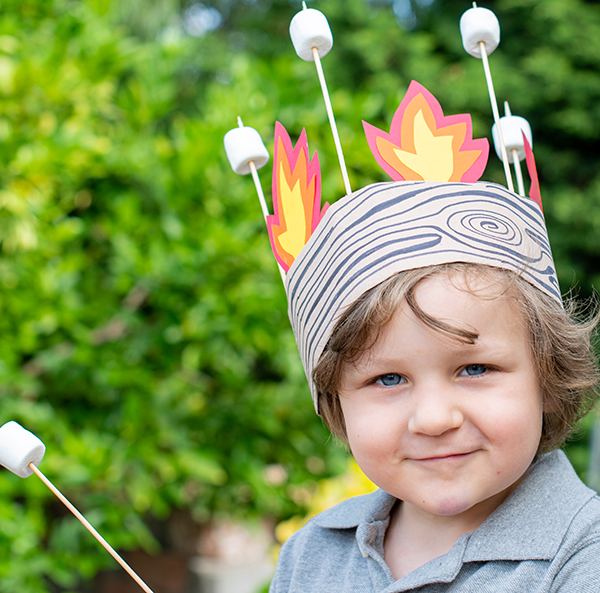
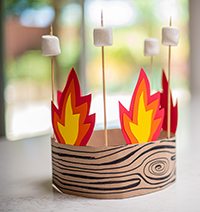
Nothing says camping like a gooey s’mores goodness, so it’s only fitting that kings and queens of the campfire wear s’mores-themed crowns. Here are instructions to make campfire crowns for your family, featuring real marshmallows on skewers (the ones on the crown are not for toasting!). 

Supplies

Scissors

Black marker or crayon

Brown paper grocery bag or brown painter's paper

Red, orange and yellow card stock (or crayons if you have none)

Glue

Stapler

4 six-inch skewers or straight sticks

4 marshmallows 

Directions

  1. Measure the circumference of your child's head and add three inches for overlap. This will be the length of the headband. Cut a six-inch wide band from a paper bag or craft paper roll in the length you just measured (including the 3 inches). 
    headband measurement 2336

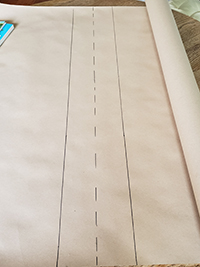
  2. Fold the paper in half so the width of the band is three inches.

  3. Create a wood grain look on the exterior of one side of the band with a black marker or crayon: Draw a 1½-inch spiral, slightly oval in shape. Add one or two more, to simulate knots in the wood. Extend the lines of the spiral straight out to the edge of the paper. Draw slightly straight lines from one end of the paper to the other, following around the knots. Retrace random parts of the lines to vary their thickness. See photos below.
    headband wood pattern 2336

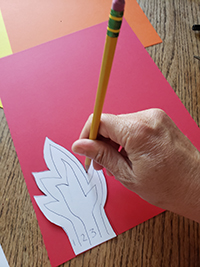
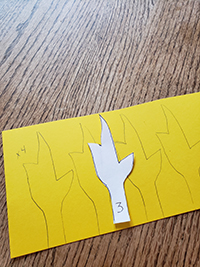
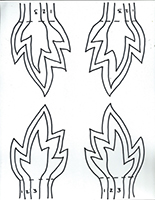
  4. Print flame template below on white cardstock or paper. If you don’t have colored paper, color flames with crayons. If using colored cardstock, trace the outer edge four times on red paper. Cut out four red flames. See photos below for reference.
    flame tracingA 2336

  5. Cut away the section of the white template labeled "1" and trace the remaining smaller template four times onto orange paper. Cut out four orange flames.
    flame tracingB 2336

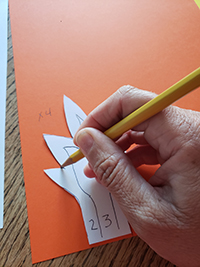
  6. Cut away the section of the white template labeled "2" and trace the even smaller remaining template four times on yellow paper. Cut out four yellow flames. 
    flame tracingC 2336

  7. Glue each yellow flame to each orange flame, and each orange flame to each red flame.

  8. Open the folded headband like a hot dog bun and glue four flames spaced two inches apart to the inside back of the band, so that the flames appear to be burning on the log.

  9. Glue a skewer between each flame. Fold the two halves back together and glue them shut. Let dry. 
    headband glue 2336

  10. Assemble the crown by stapling the ends to fit around your child's head.

  11. Push a marshmallow onto each skewer. 
    final crown 2336

Be sure not to stand too close to the fire with your crown on. Let the wild campfire rumpus start!

Download flame printable here and follow the instructions above:

Campfire Crown flame template image 2336

________

Emily Dolton grew up camping in the Adirondack Mountains of New York and prefers her marshmallows very crispy.

________

Art with Alyssa: Shamrock Watercolor Banner

Art with Alyssa: Shamrock Watercolor Banner

Here’s a St. Patrick’s Day art project the whole family can get excited about! Make beautiful watercolor designs and cut them into shamrock shapes to make a decorative banner or cards for loved . . .

Read more

Art with Alyssa: How to Make a Leprechaun Trap for St. Patrick's Day

Art with Alyssa: How to Make a Leprechaun Trap for St. Patrick's Day

Have fun this St. Patrick’s Day making leprechaun traps with the kids. Start by reading a related story, such as How to Catch a Leprechaun by Adam Wallace, for inspiration. Then use imagination an . . .

Read more

Lucky Leprechauns

Lucky Leprechauns

This St. Patrick’s Day create some cute leprechauns from plastic eggs and craft scraps.SuppliesGreen plastic Easter eggsScraps of craft foam, felt or paperSmall, miscellaneous craft items (ribbon, . . .

Read more

Swirly Shamrocks

Swirly Shamrocks

Craft this cute shamrock for St. Paddy’s Day with green paper, glue and a little glitter. You'll Need:4 sheets of 8 1/2 x 11 green cardstock or construction paperPencilRulerScissorsWhite glueTr . . .

Read more

Art with Alyssa: Nature Pendants

Art with Alyssa: Nature Pendants

Spring is an excellent time for nature-inspired art projects for kids. This month’s “Art with Alyssa” project provides instructions to make nature pendants, which make wonderful gifts for . . .

Read more

Art with Alyssa: How to Make a Nature Journal

Art with Alyssa: How to Make a Nature Journal

Creating and maintaining a nature journal is a fun, relaxing and educational activity for children (and adults) that encourages time outdoors and connection with nature. There is no right way to kee . . .

Read more

Art with Alyssa: Nature Weaving

Art with Alyssa: Nature Weaving

Supplies Twigs or sticks, 6–12” long Garden clippers Scissors Twine or yarn Variety of grasses, flowers and plants with long stems. (I used buttercup, euryops, geranium, lavender, rosemar . . .

Read more

Spring Bunny Cup

Spring Bunny Cup

This spring, craft a cute bunny cup to hold Easter treats! You'll Need:Paper cupScraps of pretty paper12” length of crepe paper streamerChenille stemGlitter3 buttons3 pom-pomsWhite gluePencilMark . . .

Read more

Burlap Bunny Treat Bags

Burlap Bunny Treat Bags

These cute burlap bunnies are fun to create and fill with treats, making them perfect for friends or classmates! Kids can participate in assembling or decorating these treat filled easter decoration . . .

Read more

Easter Egg Decor

Easter Egg Decor

Decorate real eggs this Easter to look like sweet treats such as cupcakes, lollipops and wrapped candies. SuppliesEggsEgg decorating kit/dye of choiceSmall pieces of colored and clear cellophaneBake . . .

Read more

Art with Alyssa: Recycled Egg Carton Flowers

Art with Alyssa: Recycled Egg Carton Flowers

Turning trash into treasure is not only fun, it’s great for the planet. You’ll love this recycled art project that transforms a paper egg carton into a beautiful bouquet of flowers—perfect for . . .

Read more

Art with Alyssa: Recycled Easter “Eggs”

Art with Alyssa: Recycled Easter “Eggs”

Combining Easter fun and environmental awareness in honor of Earth Day is a win-win in our eyes. Here are instructions to make DIY Easter “eggs”— a fun and clever way to wrap and hide treats f . . .

Read more

Art with Alyssa: DIY Easter Treat Baskets

Art with Alyssa: DIY Easter Treat Baskets

Make miniature baskets using simple materials like paper plates, pipe cleaners and markers; then deliver springtime treats to neighbors and friends! Supplies Paper plates, one per basket Marker . . .

Read more

Art with Alyssa — Bunch of Bunnies

Art with Alyssa — Bunch of Bunnies

This cute bunny craft is a perfect springtime or Easter activity for the kids to do at home, school or with friends. You may already have some of these supplies around the house. SuppliesOne short . . .

Read more

Be Family Informed – Sign up for our Newsletters below!

Subscribe