
It’s really fun to craft your own mini books. They make thoughtful gifts for birthdays, Mother’s Day, Father’s Day and more, or a unique place to record your own ideas and quotes. There is lots of room for creativity with this art project. Use decorative papers or artwork for the front and back covers, and then personalize the inside with illustrations, quotes, notes or stickers. Friends and loved ones will treasure such a heartfelt, handmade gift. Here are directions on how to make mini books in two different sizes.
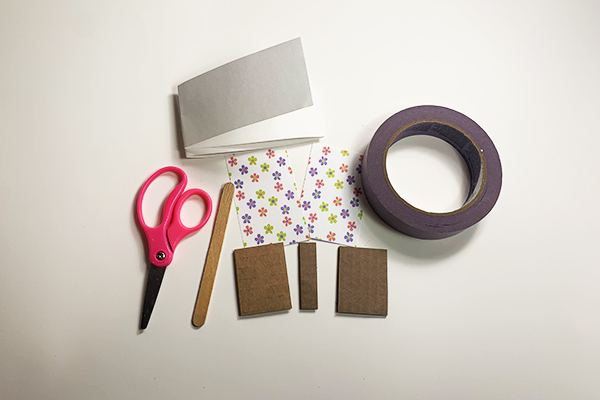
SUPPLIES
For the miniature (1½” x 2”) book:
- Two pieces of cardboard 1½” x 2” (OK to use chipboard)
- One cardboard spine ½” x 2”
- Two colored papers 2¾” x 2”
- Long strip of construction paper or watercolor paper 1¾” x 22”
- Scissors
- Glue or glue stick
- 1.41” wide Masking tape (3½” long)
- Popsicle stick
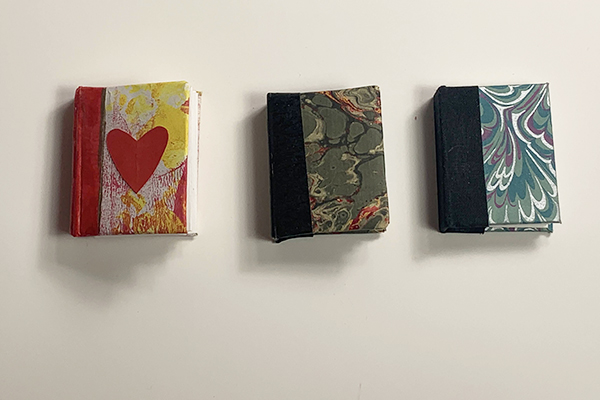
- Colored paper for the covers—could be plain paper that you paint, origami paper or scrapbook paper
- Decorative items: colored masking tape, washi tape, paint, stickers, markers, colored pencil, etc.
Note: Colored paper for the covers could be plain paper that you paint, origami paper or scrapbook paper.
DIRECTIONS
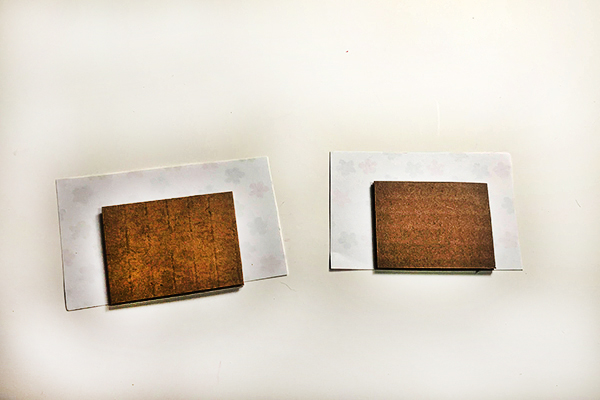
- Place decorative paper face down on the work surface. Lay it horizontally (long side on top and bottom; short sides on left and right).
- Spread glue on one side of the cardboard cover piece and place (glue side down) on the “wrong” side of the paper; one cover edge should be flush with one long side of the paper. For the smaller book this means you lay one 2-inch side of the cover along one long side of the paper. Press firmly.
Note: There will be three sides with paper extending past the cover. - Repeat these steps with second cardboard cover and piece decorative paper.
- Miter the corners (cut a triangle off the corners). This reduces paper thickness so it folds more easily.
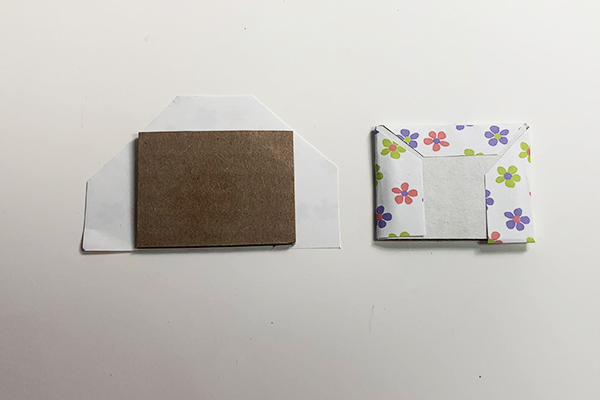
- Fold remaining paper sides over the cardboard edges and affix with glue. Repeat these steps with the second cover.
- Lay the tape down on your work surface, sticky side up.

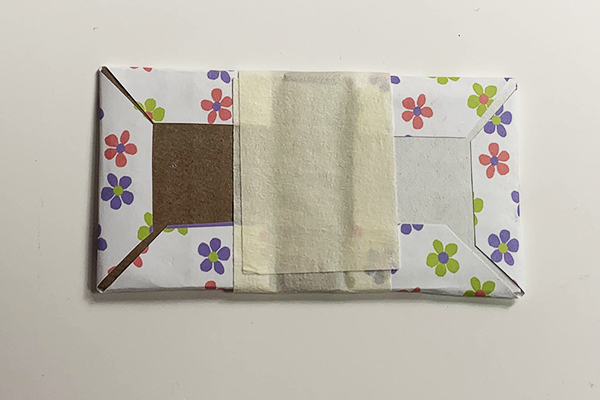
- Carefully place the book spine (½” wide cardboard) on the tape, centered top to bottom and side to side. Place the covers adjacent to the spine leaving a small space between the cover and the spine. Press them down to adhere. Fold tape over the inside pieces and press firmly.
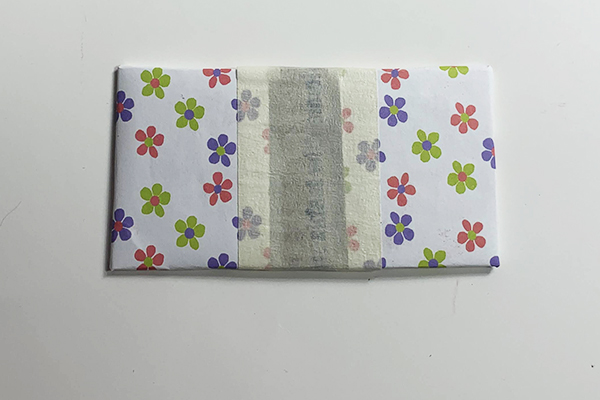
- Turn book over; carefully use the popsicle stick as a burnishing tool to adhere the tape to the covers and spine. Optional: cover plain masking tape with colored masking or washi tape to make the book spine more attractive.
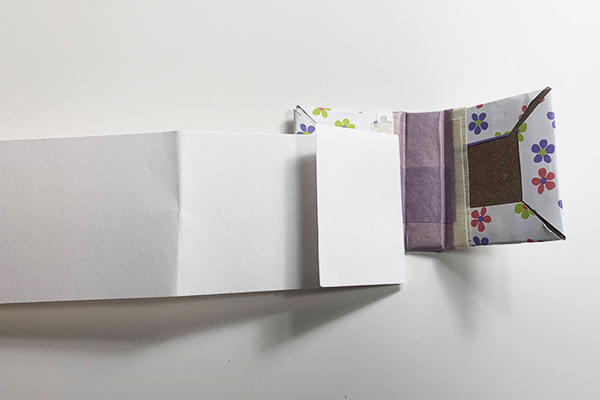
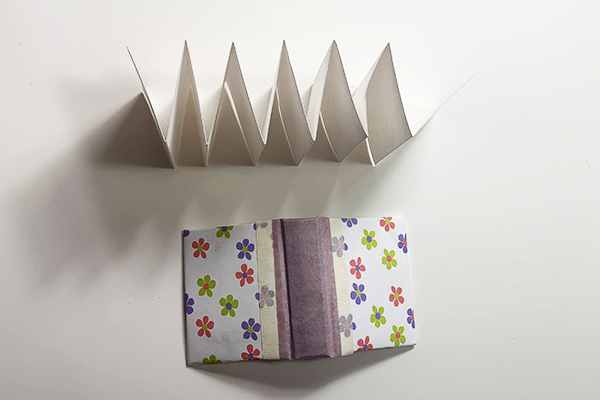
- Using the book as a guide for size, make the first fold of your “accordion” pages with the long strip of paper. Fold back and forth slowly until you have no paper left to fold – each fold should create a “page” that is the same size (or slight smaller) than the book. If there is extra paper that isn’t the same size as the other folds, cut it off.
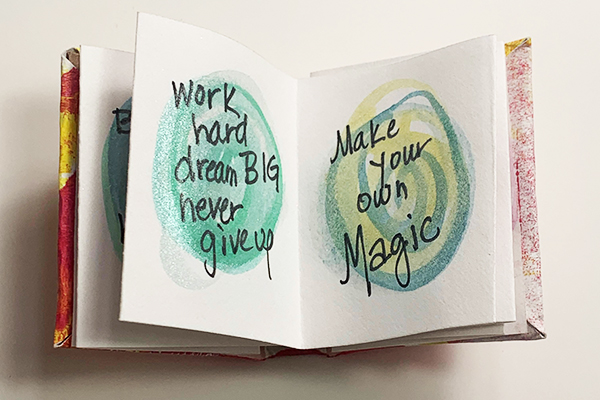
- It is easiest to draw or paint images on the pages now (before gluing them inside the book), but you can do it after the book is assembled if you wish. Consider choosing joyful quotes for each page of the tiny book.
 .
. 
- Glue the “front page” (first fold of accordion) to the front cover and the “back page” (last fold of the accordion) to the back cover. Allow to dry if using liquid glue.
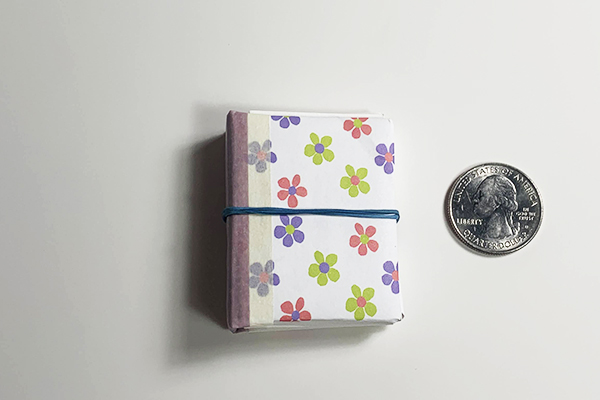
- Close the book and secure with a rubber band for a day or two so it stays closed.
SUPPLIES
For the larger (5”x5”) book:
- 2 pieces of cardboard 5 x5” (can use chip board)
- 1 cardboard spine ½”x 5”
- 2 colored cover papers 6”x 7”
- Long strip of construction paper or watercolor paper 4¾” x 48¾” (piece together several sheets to get this length)
- Scissors
- Glue or glue stick
- 1.41” wide Masking tape (9½” long)
- Popsicle stick
- Colored paper for the covers—could be plain paper that you paint, origami paper or scrapbook paper
- Decorative items: colored masking tape, washi tape, paint, stickers, markers, colored pencil, etc.
DIRECTIONS
Follow directions for 1½" x 2" book above.
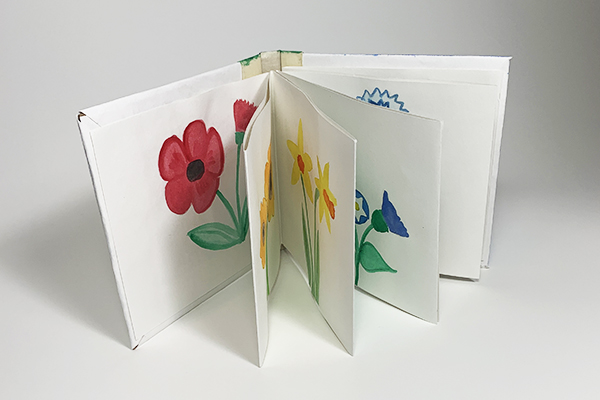
Note: The art for the 5”x5” book was inspired by Planting A Rainbow by Lois Ehlert.
Alyssa Navapanich is a nationally recognized and award-winning art educator who is San Diego Family Magazine’s “Art with Alyssa” contributor. She teaches art to elementary school kids in East County. All photos above provided by Alyssa Navapanich.
_____________


