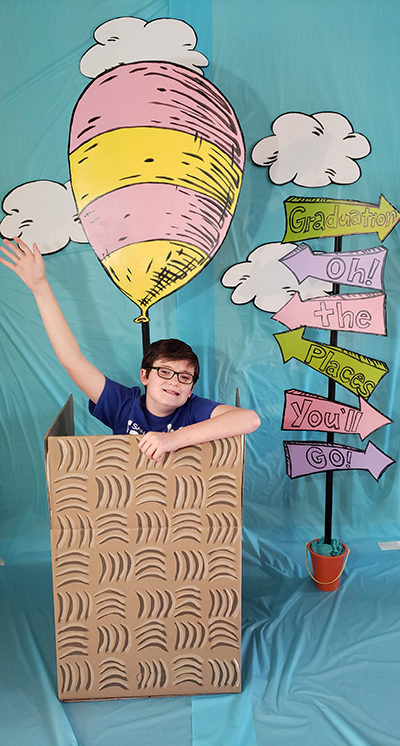
This fun photo booth, based on the Dr. Seuss classic “Oh, the Places You’ll Go,” is perfect for preschool and elementary school graduation (or promotion) ceremonies, and is a great addition to Read Across America festivities. The project takes about four hours (with two people), but requires overnight drying. Although the photo booth can be made easily and inexpensively using poster board and tempera paint, we used more durable materials so we can set it up outdoors – and use it more than once.
TOOLS
Glue gun, scissors, box cutter, paintbrushes
MATERIALS
Extra-large packing box (we used 22” x 22” x 22”)
One large 24” x 36” foam core
3-pack of 18” x 20” foam core
3-pack of 12” x 18” white poster board
2 five-foot black PVC pipes (¾”)
2 plastic sand pails
Roll of sky blue paper or plastic
Glue sticks
Masking or heavy duty packing tape
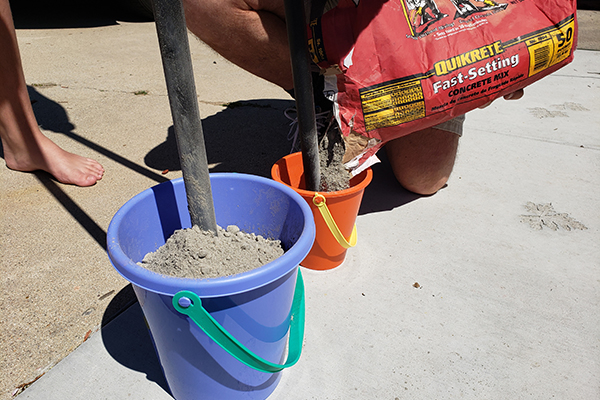
Small bag of Quikrete cement
Tester pints of exterior latex paint: black, lilac, pink, yellow, dark brown, light tan and soft lime green
Two pieces of colored tissue paper
Notes:
- Quikrete sets in just a few hours and fully dries overnight, it is not as expensive as plaster of paris and once dry, it is easily righted if a student knocks it over.
- Poster board tends to buckle and bend quickly when in direct sunlight; that’s why we used foam core.
- If you use the durable materials suggested, the photo booth can be stored and used again.
PREP
Have one person hold each length of PVC pipe straight and upright in the center of the pails, while the other pours in the dry Quikrete until the pail is ¾ full. Following the directions on the package, pour water into the Quikrete until the product is permeated, but not overflowing. It will take only a few minutes for the pipe to stand on its own. Let dry for 12 hours.
MAKING SIGNS
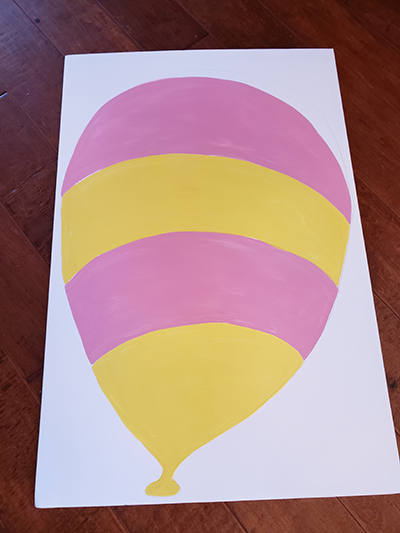
Draw a big balloon shape on the largest piece of foam core using “Oh, the Places You’ll Go” book illustrations as a guide. Paint pink and yellow strips and allow to dry.
While the balloon is drying, paint the other three pieces of foam core: one each of lilac, lime green and pink; let dry.
Cut out the balloon shape and six directional arrow signs (two of each color) with a box cutter. An opaque projector is helpful if your drawing skills aren’t up to snuff.
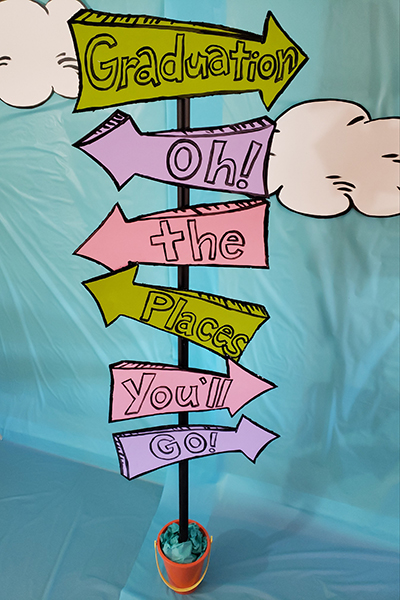
Using black paint, paint the words Oh! The Places You’ll Go! on five arrow signs (one word on each sign) and outline the edges in black (see photo for reference).
Paint the name of your event (graduation), the date or the name of your school on the sixth sign (to be placed on the top of the pole).
Outline the balloon in black and add the signature Dr. Seuss “hatch marks.” Using the same black paint, outline 3–6 clouds on white poster board in Seussian style. Once dry, cut out the clouds.
MAKING THE BASKET
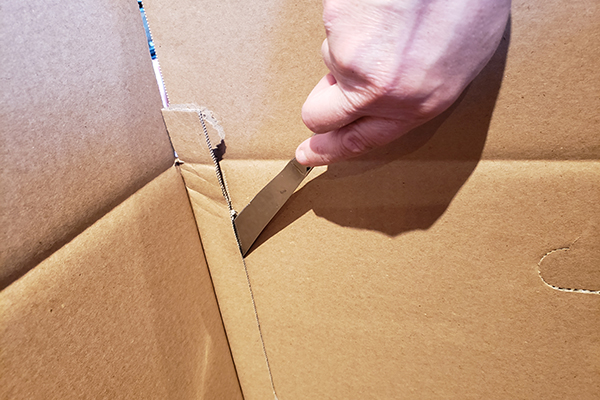
While the signs are drying, use the box cutter to release the seam of the packing box and remove one full side of the box. Turn the box inside out so that only solid brown faces outward (no words).
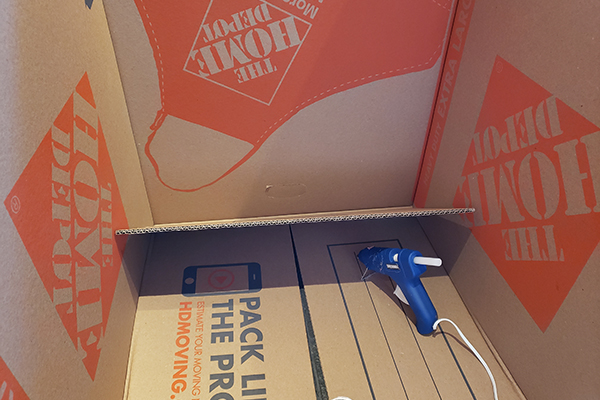
Use a hot glue gun to adhere the three remaining flaps to each other to create a three-sided box. Cut off one of the flaps from the side you removed and glue that to the base for added stability.
This box becomes the “basket” of the hot air balloon. Leave the top flaps up for taller kids and tape the corners for stability. Fold the flaps down for kinders and preschoolers.
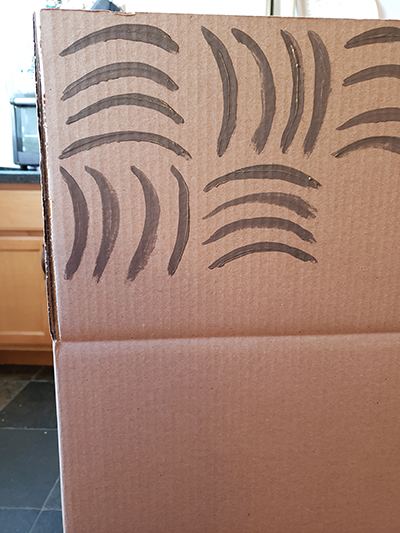
To create the basket weave look, on the front side of the box, paint four, dark brown frown-faced lines in a 4” x 4” area. Right next to that, paint four right-parentheses shaped lines in a 4” x 4”area. Alternate across the box, as shown in photo. As you start the second row, use the opposite pattern and repeat across the row creating a checkerboard effect. Fill all three sides of the box with this pattern. When you are finished, repeat the same pattern with the light tan paint. This time, paint tan “frowns” above all dark brown frowns, and tan parenthesis to the right of each dark brown parenthesis. See photo for reference.
PUTTING IT ALL TOGETHER
After the signs and balloon dry, use a hot glue gun to adhere them to the PVC pipes (balloon to one; all signs to the other). Cover the top of the Quikrete (and add a touch of color) with crinkled tissue paper.
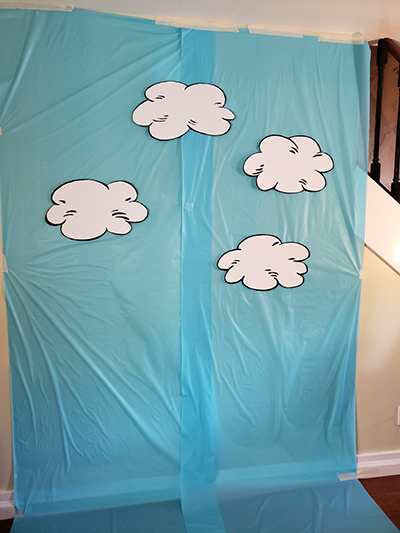
Use tape to hang sky blue paper or plastic to the wall as a backdrop. Adhere clouds to the backdrop with tape. Set the basket in the backdrop area with the balloon stand inside of it. Place the sign next to it.
Depending on the size/age of students, they can stand or kneel for photos.
For more ideas, visit our Dr. Seuss Party board on Pinterest: www.pinterest.com/sandiegofamily/dr-seuss-party.
________
22q 11.2 DS parents Emily Dolton (artist) and Andrew Gilbert (school-based occupational therapist) enjoy doing projects that celebrate student success.
________


