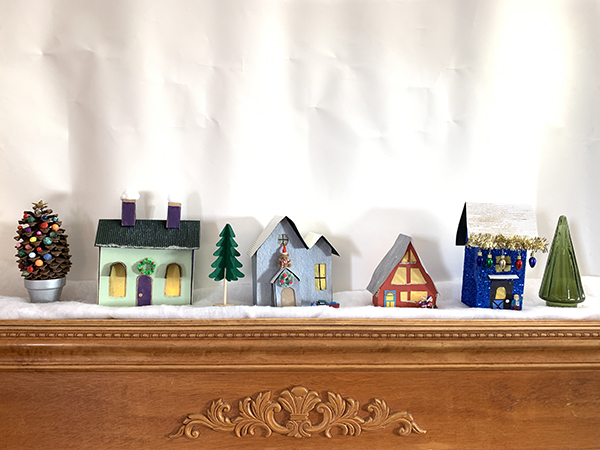
Get the whole family involved in creating vintage Christmas village houses using cardboard, glitter and a whole lot of creativity!
Vintage putz (or glitter houses) originated in Europe in the 1920s. Putz comes from the German word “putzen,” meaning to decorate, and the name was used for little handmade glitter houses decorations at Christmas. The Japanese are credited for taking the cute little houses to the next level by making space in the back for a lightbulb. Glitter houses became very popular when cellophane was put in the windows that allowed the light to glow through. Here’s how to a Christmas village of your own:
SUPPLIES
Empty, clean cardboard boxes of varying sizes, such as cereal boxes and tea boxes
Scissors
Acrylic paint (your color choices)
Paintbrush
Masking tape or painters tape
Pencil
White glue or hot glue
Yellow or gold tissue paper (or whatever color you want the windows to be)
Markers
Colored paper or scrapbook paper
Small holiday decorations such as miniature wreaths, snowmen, ribbon, tinsel, etc.
Battery-operated tealights
DIRECTIONS
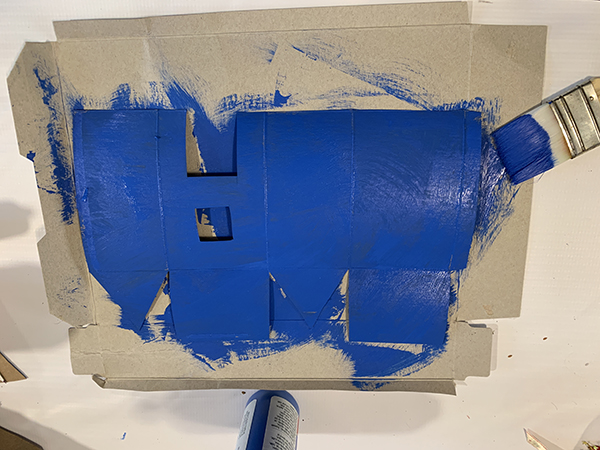
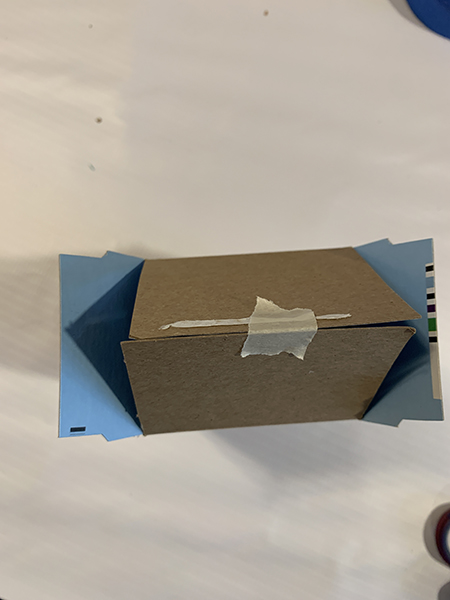
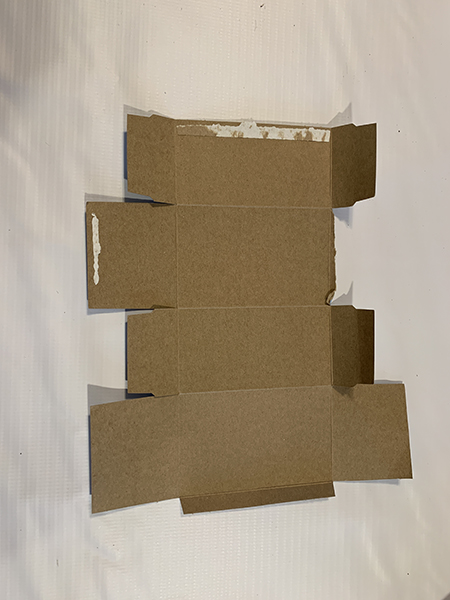
- Find boxes that you like the shape of. I like using Tazo tea boxes. Carefully open it up along the seam. Cut off the flaps on one end. This open end will be the bottom of your house.
- Paint the inside of the box in a color of your choice.
- Gently fold the box back together with the paint side facing out and lightly tape it so you can decide where to put the door and window(s).
- Draw the door and window(s) on the box in light pencil.
- Open the box back up and carefully cut out the window(s) and door with an X-acto knife or by poking a hole with the scissors and cutting them out. Parental help and supervision are needed for this step!
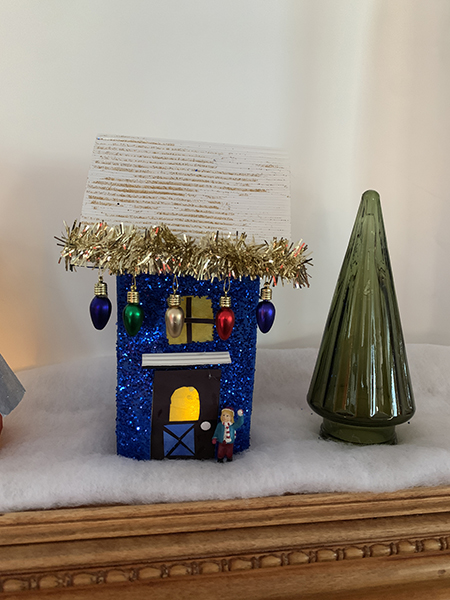
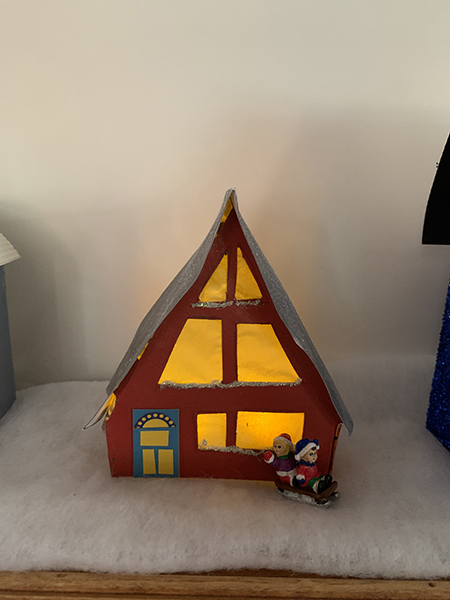
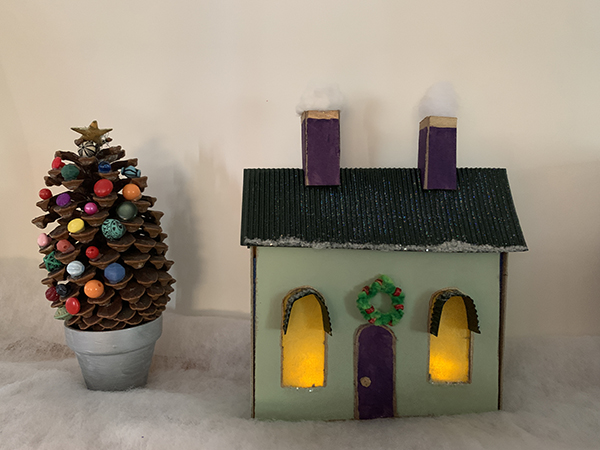
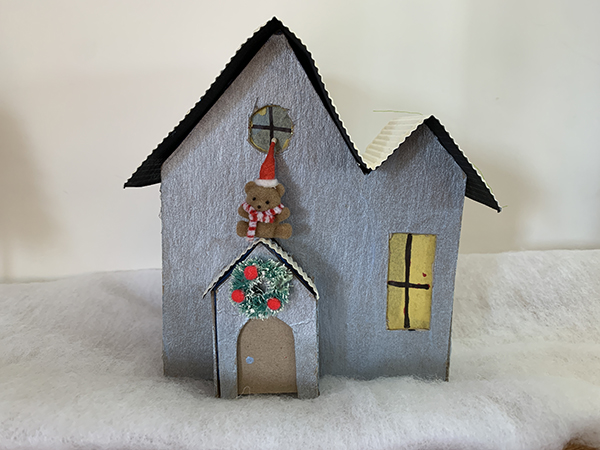
- Cut a piece of tissue paper to fit each door and window and tape or glue it on the non-painted side of the box to cover each opening. Optional: Draw or add additional details such as window mullions (panes) and a doorknob. See photos for ideas.
- Once the door and windows are complete, tape the box back together (tape on the inside) to create your house or building. Add a bead of hot or white glue to the seams. Optional: Form an “A” shape at the top by folding flaps together and carefully cutting extra cardboard away as needed.
- Decorate the house or building. You can put glitter all over or use glitter glue in specific spots. Consider covering the roof in different colored or textured paper. Add holiday decorations, scraps of cut paper or other decor to your liking.
- Complete the look of the house by placing it in a scene with snow, trees, snowmen and other characters or several houses. Set each structure over a battery-operated tealight and see your village glow in the evening!
- Optional: Make a base for the glitter house from cardboard or a flat slice of a tree branch. If you decide to glue the house to a base, be sure to cut an opening in the back of the house so you can place a battery-operated tealight inside.
Alyssa Navapanich is an award-winning art educator who is also San Diego Family Magazine’s “Art with Alyssa” contributor. She teaches art to elementary school kids in East County San Diego. All photos provided by Alyssa Navapanich.
______________


