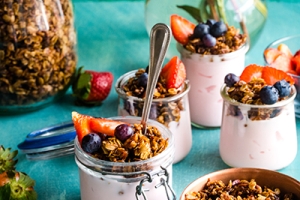
It’s strawberry season! Canning is an easy way to enjoy the taste of spring all year. Making homemade jam may sound daunting, but anyone can do it using basic kitchen skills. Children can take part in the process, too. Follow these steps with your family to enjoy your own homemade berry jam.
Quicklinks: Homemade Jam | Easy Freezer Jam
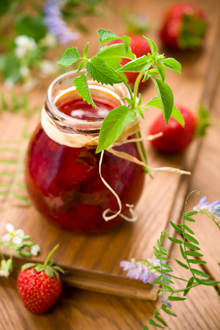
HOMEMADE JAM
Supplies Needed
3 pint or 6 half-pint glass canning jars
1 two-piece cap for each jar (with a new lid matching the jar size – either wide-mouth or regular)
sugar
pectin (a thickening agent available in liquid or powder and found in the baking aisle of your local supermarket)
potato masher for crushing the berries
metal spoon
rubber scraper
large bowl
6- to 8-quart sauce pot
ladle
lid wand (for removing lids from hot water. Tongs will also work).
jar lifter
wide mouth funnel
large canning pot with rack (stock pot and rack insert)
TIPS BEFORE YOU START:
• Reserve two to three hours
Plan your jam making adventure for an uninterrupted block of time. Our family often holds jam-making sessions with friends to share the work and to pass along the skills to others.
• Set up your work area
Clear your kitchen table or counter and make room on the stove for three pots (one for cooking the jam, one for heating jar lids and the third for the boiling canner).
• Gather your supplies
One of the drawbacks to trying out home preserving has typically been the expense of investing in supplies. Hot water bath processing (recommended by the USDA) requires a large canning pot with a rack and accessories, which can cost up to $50. However, Jarden Home Brands (www.freshpreserving.com) recently introduced an inexpensive starter kit, perfect for small canning projects such as this one, that includes a rack and lifter designed to fit a regular stock pot.
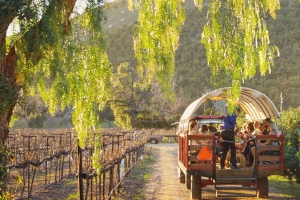
1.) Buy or pick your fruit (see below for locations to pick your fruit) A visit to a pick-your-own farm brings you directly to the source. It also ensures the freshest produce for canning. Most farms are kid-friendly so everyone can take part in picking. Joy Cox says that some of the fun for her comes from watching her kids get excited about picking the fruit because they know it’s for jam. “Knowing that I’m providing something for my family that they thoroughly enjoy brings me a feeling of great accomplishment.”
For those who live too far from berry farms, a quick trip to a nearby farmer’s market or the local supermarket also works. You’ll need about 2 ¼ - 4 ½ pounds of berries per batch of jam.
2.) Prepare the fruit Rinse berries quickly under cool water in a colander. Drain. In a large bowl, mash the fruit, a small amount at a time using a potato masher. Children particularly enjoy this part of the process!
3.) Prepare containers Wash jars, rims and lids in hot soapy water. To prevent jars from breaking, bring water in your canning pot to a low boil. Turn off heat. Then submerge clean jars for 10 minutes.
4.) Cook jam Transfer mashed berries to the sauce pot in quantity indicated in pectin instructions. Add pectin. Heat to boiling, then add sugar according to pectin manufacturer’s recommendations. Stir until dissolved and return to rolling boil. Cook for one minute, stirring constantly. Be careful to follow times exactly, as the jelling process requires precision. In our house, the kids like counting down the seconds and announcing when time is up.
5.) Skim off foam Once the jam has cooked, remove from heat and skim foam from surface of cooked jam with metal spoon and transfer to a separate bowl. Set aside.
6.) Jar the jam
Pour water out of each heated jar just prior to using. Then, using a funnel and ladle, scoop jam into jars, leaving a ¼” gap between the top of the jar and the jam. Carefully wipe lip of the jar clean, then put on the lid and rim, closing tightly.
7.) Process in hot water bath Place jars on raised rack in canning pot as soon as they are filled and capped. When rack is full, slowly lower rack with jars into heated water, until jars are submerged. Return to boiling and boil for 15 minutes. Turn off heat. Carefully remove jars from pot using jar lifter and set on wood cutting board, trivets, or thick towel to cool.
8.) Celebrate While you clean up, listen for the sound of jar lids popping as the seals set. Cheer with each pop. You did it! Your jam is made. Spread it on bread. Enjoy!
Where to Pick Your Own Fruit
Carlsbad Strawberry Company
Located at the corner of Cannon Rd & Paseo del Norte
Open 7 days a week, 9 a.m.-6 p.m, Camarosa strawberries are in season.
www.carlsbadstrawberrycompany.com
Heritage Farms
21345 San Pasqual Road, Escondido; 760-746-8822
U-Pick strawberries: call for picking hours and availability.
Lake Sutherland Farms
20625 Sutherland Dam Rd. (at Hwy 78) Ramona
760-788-4360.
U-pick blackberries and raspberries (berry season is in August). Open Thurs - Sun.
Freezer Jam
Interested in making homemade jam, but turned off by all of the time, work and know-how that goes into canning? Then, freezer jam could be just the thing for you. Here’s what you need to know to make a batch of freezer jam in 30-minutes or less:
Frozen Strawberry Jam
(from SureJell)
Makes 5 cups
2 pint strawberries or 2 cups crushed strawberries
4 cups sugar
1 box fruit pectin
3/4 cup water
1.) Prepare strawberries by rinsing and removing the stems.
2.) Crush the strawberries with a fork.
3.) Add exact amount of sugar.
4.) Mix well. Let set for 10 minutes.
5.) Put pectin and water in a small saucepan.
6.) Bring to a boil on high heat, stirring constantly.
7.) Boil 1 minute, stirring constantly.
8.) Remove from heat.
9.) Stir pectin mixture into strawberries. Stir constantly until sugar is completely dissolved and no longer grainy, about 3 minutes.
10.) Pour into 5 prepared containers, leaving ½ inch of space at the top for expansion during freezing.
11.) Cover. Let stand at room temperature for 24 hours until set.
12.) Freeze up to 1 year.