Family Science

Staying “in the Loupe”: How to Inspire Young Scientists at Home
Science often begins with a simple magnifying loupe (or magnifying glass)—the kind that fits easily into a pocket or kitchen drawer. Place it in a child’s hand and something powerful happe . . .

How to raise STEM-savvy students: Engaging science activities for kids
Opportunities to engage with STEM (Science, Technology, Engineering and Mathematics) can be found all around—but how do parents encourage kids to embrace them? And why is STEM-learning so im . . .
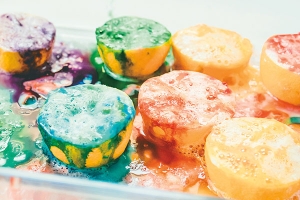
Easy Science Experiments for Kids
The kids will love doing these easy science experiments at home with fruit and materials you may already have on hand. Try making lemon volcanoes or sending a secret message to a friend with a banana! . . .
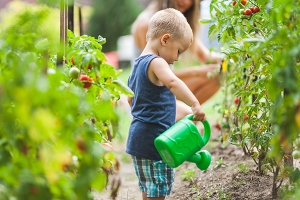
Benefits of Gardening with Kids
Wondering how to get your kids to eat more veggies? Grow them.
Whether it’s a container on the patio or a raised bed, gardening is easier than most people think, even with limited space . . .
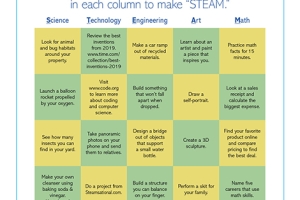
Full STEAM Ahead - STEAM Bingo
Ready to have some fun with STEM (science, technology, engineering & math)? Complete at least one activity in each category (plus A for Art) to make STEAM. Challenge kids to "spell" STEAM differen . . .

Full STEAM Ahead: DIY STEM Kits for Kids
Implementing open-ended STEAM (Science, Technology, Engineering, Art, Math) activities has numerous benefits to future makers, and encouraging students to tinker in a supportive environment promotes . . .
How to Make Popcorn Pop Rocks
Help the kids make scientific discoveries at home with candy. With a little hot water, you can make these Pop Rocks really pop!Time: 10 minutesSkill level: Get a grown-upSuppliesPop RocksHot water ( . . .

Full STEAM Ahead: 15-Minute STEM Activities
Fun, easy STEM activities are a great way to entertain kids and help them make unique discoveries at home. With a few simple, low-cost supplies and minimal directions, young scientists will be engag . . .
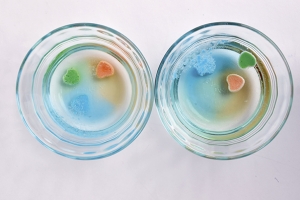
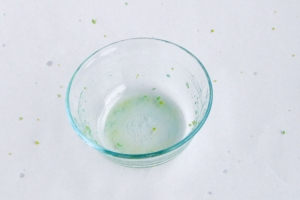
Acid Dissolving Test
Here’s an easy, kid-friendly science project you can do at home!Time: 1 hourSkill level: MediumYour digestive system uses acid. Does that mean that acid dissolves candy?What you need:Candy that di . . .
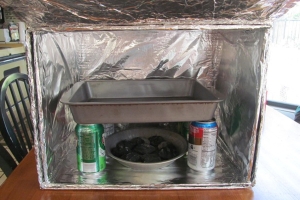
How to Make a Box Oven
There are several different types of box ovens you can make. These instructions are for a box oven with a hinged lid. If you use the sturdy materials recommended and take good care of it, you should b . . .

STEM Activities for Kids
With the popularity of STEM (science, technology, engineering and math) education in school, you might wonder what you can do at home to boost a child’s sense of curiosity and ability to problem-s . . .
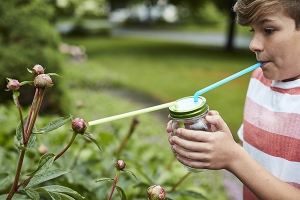
Make a Bug Vacuum
Capture insects with ease using this simple DIY bug vacuum kids can make at home.
Scientists capture bugs for study using a mouth-powered vacuum, called an aspirator or a pooter. Swallowing specimens . . .
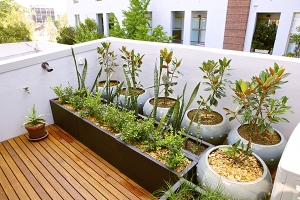
Plant a Patio Garden
No Yard? Plant a Patio Garden with Kids
Whether you live in a high-rise apartment or a house with limited green space, your family can reap the benefits of gardening together. Gardening teaches kid . . .

Full STEAM Ahead: STEM for Your Health
Increased screen time and busy schedules have led to a number of health issues, including decreased physical activity and unhealthy eating habits. Consider using easy STEM activities to help your fa . . .
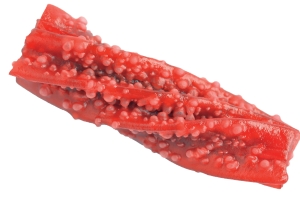
How to Make Warty Licorice
Can you make a smooth piece of licorice grow warts? Do this science experiment with the kids to find out!Time: 5 minutesSkill level: Get a grown-upSuppliesTwizzlers licorice twists (the Pull-n-Peel . . .